Meal-prep maintenance guide
Best Dish Racks for Drying Meal-Prep Containers and Lids
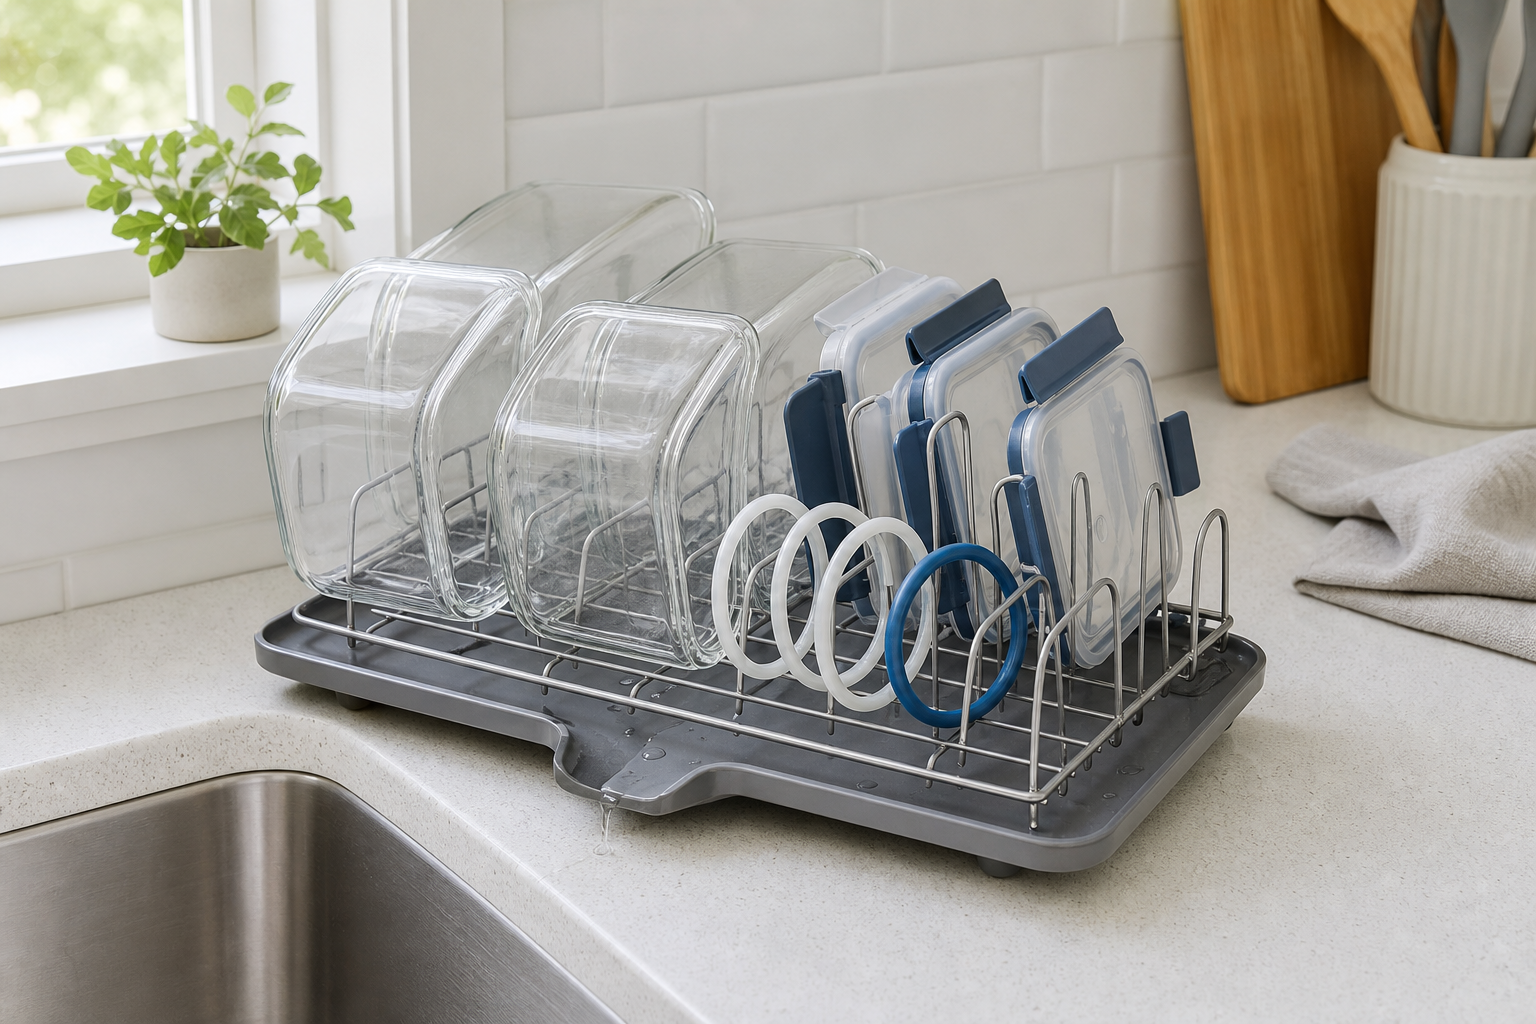
Meal-prep containers create an awkward drying load: deep bodies trap water, thin lids fall flat, and removable seals need a place where they will not disappear. The best rack is the one that holds those parts apart, sends water where intended, and fits the counter when fully loaded.
As an Amazon Associate, GoodWeighFinds earns from qualifying purchases.
Who this guide is for
This guide is for adults who regularly wash several reusable food containers and find that lids, gaskets, dividers, or deep container bodies stay damp or take over the counter. It focuses on ordinary cleanup and storage friction, not weight loss, food rules, or sanitation promises.
For the larger routine-support approach, start with the routine-support tools pillar. If the container system itself is the problem, compare materials and lid designs in the meal-prep container guide. The replacement-lid guide covers cracked, warped, missing, and incompatible lids.
Best-fit formats, not unsupported rankings
- Best format for many flat lids: A rack with closely spaced vertical slots that hold the actual lid thickness without letting small lids fall through.
- Best format for deep containers: Wide, stable dividers that tilt container bodies enough for water to leave the corners without letting heavy glass pieces collide.
- Best format for changing loads: An expandable or modular rack whose smallest and largest footprints both fit the intended counter area.
- Best format beside the sink: A drainboard or spout that can point toward the basin without crossing a counter seam or creating a puddle behind the rack.
- Best format for occasional prep: A folding or roll-up rack if it holds container parts securely and has a practical drying and storage location of its own.
Selection criteria that matter
- Usable footprint: Measure length, width, and height where the loaded rack will sit. Include faucet swing, cabinets, backsplash outlets, and the space needed to lift a tall container out.
- Slot spacing: Compare the narrowest and widest gaps with the thickness of lids, rims, tabs, and gaskets. A plate slot may be too wide for a thin snap lid.
- Loaded stability: Look at foot placement, base width, rack weight, and the maker’s loading diagram. Heavy glass containers should not all be forced onto one narrow side.
- Drainage path: Check whether the tray slopes, whether its spout rotates or extends, and exactly where water exits. “Self-draining” does not show that it reaches your sink.
- Air separation: Parts need enough space to avoid nesting. A high advertised capacity is not useful if containers and lids touch across broad wet surfaces.
- Small-part control: Removable seals, clips, valves, and dividers need a ventilated cup, shallow basket, or dedicated area where they remain visible and cannot fall into the drain.
- Materials and care: Verify the exact cleaning method for the rack, tray, feet, and utensil holder. Treat “rustproof,” “stainless,” and “dishwasher safe” as model-specific claims, not guarantees.
- Storage: For folding or expandable designs, confirm folded dimensions and whether wet joints or overlapping rails can be opened for cleaning and drying.
- Replacement parts: Check whether drainboards, spouts, feet, clips, and utensil cups are replaceable and currently available.
A practical comparison framework
Measure the counter and lay out one normal batch of clean container parts. Then give each rack a yes, no, or unclear for these questions:
- Does the loaded rack fit without blocking the faucet, prep area, outlet, or cabinet door?
- Can container bodies sit tilted and separated without their weight making the rack unstable?
- Do the slots hold every common lid upright by its edges rather than trapping a wet face?
- Is there a ventilated, visible place for gaskets and other removable pieces?
- Does the tray send water fully into the sink from the planned position?
- Can the tray, spout, joints, feet, and accessory cups be reached for cleaning?
- Are material, care, capacity, and replacement-part claims stated for the exact model?
- Can the rack be stored or reduced in size without creating another damp, awkward item?
- Would it still solve a real cleanup problem if it had no effect on eating habits or body measurements?
Drainage and drying claims have limits
A rack creates separation and a route for water; it does not prove that every surface will dry by a set time or that an item is sanitized. Drying depends on how parts are positioned, contact between pieces, room airflow, humidity, remaining water, and the container maker’s instructions. “Antimicrobial,” “hygienic,” or “fast-drying” language should not replace normal washing, inspection, and care.
Follow the container maker’s directions for removing and reinstalling gaskets, valves, and clips. Do not force pieces apart or balance heavy glass on supports not designed for it. Clean the rack and drainboard as directed when residue or standing water appears.
Who should skip this purchase
Skip a new rack if your current one holds a normal load with separation and drains correctly, or if a clean towel or sink-compatible roll-up rack already handles the occasional batch. Skip any model whose dimensions, drain direction, care instructions, or material claims are unclear.
A large expandable rack is also a poor fit if its usable capacity requires giving up the counter space needed to prepare food. If only one lid or gasket repeatedly holds water, changing its position or following that container maker’s drying instructions may solve the issue without another countertop product.
Bottom line
The best dish rack for meal-prep containers is a layout decision, not a capacity contest. Measure the loaded counter area, match slots to real lids, give small seals a visible place, trace the full drainage path, and check whether every part of the rack can itself be cleaned and dried.