Wet-weather gear guide
Best Shoe Drying Racks for Wet Walking Gear
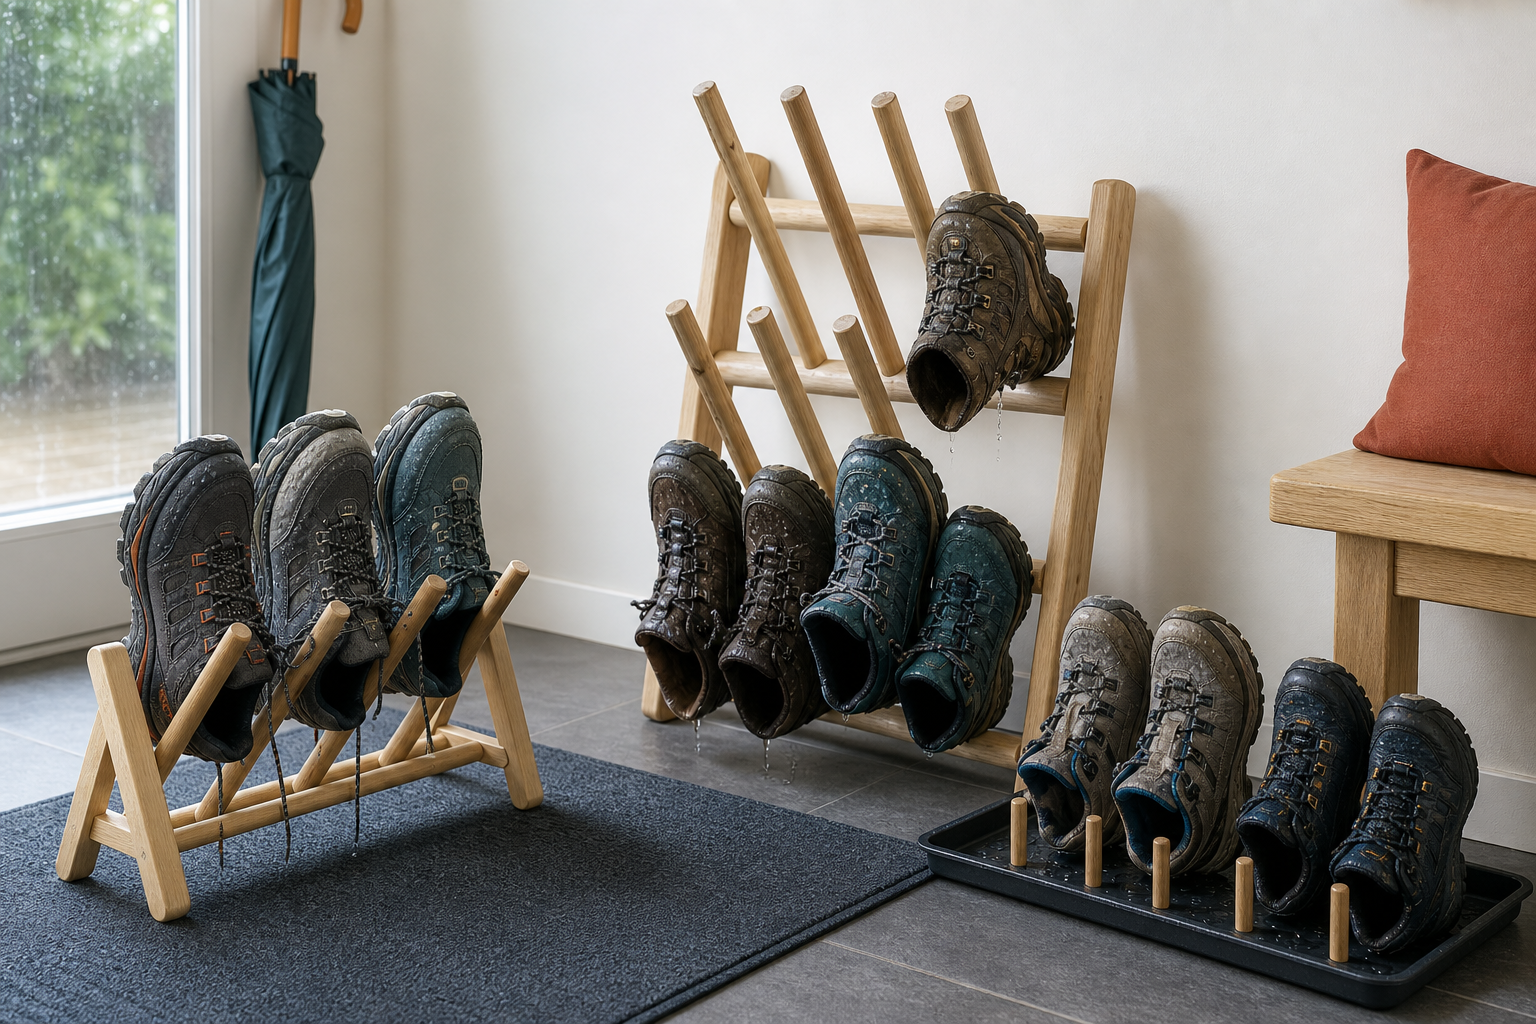
A passive shoe rack can give rain-damp walking shoes a defined place to drip and air out, but the useful choice depends on shoe shape, available floor space, airflow, and what the footwear maker allows. This guide compares non-heated formats; it does not rank untested products or claim that a rack sanitizes footwear.
As an Amazon Associate, GoodWeighFinds earns from qualifying purchases.
Who this guide is for
This guide is for adults who already walk in wet conditions and want a tidier place for damp shoes between uses. A rack is a storage and maintenance tool, not a weight-loss product or a reason to walk in unsafe weather. For broader low-hype walking and kitchen categories, start with the routine-support tools guide.
Best fit by drying-space problem
- Best fit for one or two pairs: A short peg or rail rack with enough spacing to keep uppers from pressing together.
- Best fit for a household: A stable freestanding rack with clearly stated capacity and enough clearance between tiers.
- Best fit for narrow entryways: A vertical design whose measured base does not obstruct the door, walkway, vent, or emergency exit.
- Best fit for occasional use: A folding rack that locks securely when open and has a realistic stored thickness.
- Best fit for drip-prone gear: A rack paired with a removable, washable tray or mat that extends under every drip point.
Selection criteria that matter
- Measured footprint: Compare the assembled width, depth, and height with the actual drying spot. Include room for shoes projecting beyond the frame.
- Shoe spacing: Openings should not be crushed against neighboring shoes. Check peg distance and useful vertical clearance for the footwear you own.
- Support surface: Rounded, smooth pegs or broad rails are easier to evaluate than sharp, unfinished contact points. Follow the shoe maker’s care directions before drying shoes upside down.
- Airflow layout: A rack should hold shoes apart rather than create a tight pile. Passive airflow still depends on room ventilation, humidity, shoe materials, and how wet the shoes are.
- Drip control: Check whether a tray is included, removable, deep enough for ordinary drips, and easy to clean. If not, measure for a separate mat.
- Materials and finish: Look for maker guidance on moisture exposure, cleaning, and indoor or outdoor placement. Do not assume unfinished wood, coated steel, or plastic handles repeated wetting equally well.
- Stability and load: Check the stated weight limit, base width, joints, fasteners, and tip risk when removing one shoe. Wall-anchoring claims should match the supplied hardware and wall type.
- Assembly and foldability: Review parts, tools, locking points, and folded dimensions. A folding rack is only useful if it is stable when open and practical to store.
- Cleaning access: Mud and grit collect around feet, pegs, and trays. Favor surfaces and joints that can be reached without dismantling the entire rack.
- Return terms: A useful return window matters when listing measurements or shoe clearance turn out to be incomplete.
A practical comparison framework
Mark each candidate yes, no, or unclear. Treat an unclear measurement or care claim as something to verify before buying.
- Does the assembled footprint fit the drying location with the longest shoes loaded?
- Can air move around each pair without uppers or openings being squeezed together?
- Will the contact points support the exact shoe or boot shape without obvious stretching or sharp pressure?
- Is water caught by a washable tray or mat rather than redirected onto the floor or wall?
- Are material care, load, assembly, and indoor-placement instructions specific?
- Can the rack be cleaned around joints and feet where grit collects?
- Will children, pets, a door swing, or a narrow walkway make the loaded rack unstable or obstructive?
- Would it solve a recurring wet-gear problem better than a tray and an existing open shelf?
Passive racks versus heated shoe dryers
This page covers passive racks only. Heated or fan-powered dryers introduce separate questions about power, temperature, timers, noise, material compatibility, electrical placement, and product-specific safety instructions. Do not assume heat is suitable for leather, adhesives, foam, waterproof membranes, or removable insoles; check the footwear maker’s care label.
A passive rack also does not prove that shoes are sanitized, deodorized, mold-free, or completely dry. Drying time varies with saturation, construction, room humidity, temperature, ventilation, and whether removable components can be taken out under the maker’s instructions.
Placement and upkeep
Set the rack on a level surface where it does not block a doorway or walking path. Keep it away from direct heaters unless both the rack and footwear instructions explicitly permit that placement. Empty and clean drip trays instead of allowing standing water to collect, and inspect joints, coatings, pegs, and feet periodically for loosening or damage.
For the walk itself, wet-weather clothing and route decisions matter more than the drying station waiting at home. The packable rain-jacket guide explains how to compare fit, ventilation, and limited weather claims without treating clothing as a safety guarantee.
Who should skip a shoe drying rack
Skip the purchase if shoes are only occasionally damp and an existing ventilated shelf over a washable tray already works; if the rack would narrow an exit or create a trip hazard; or if the listing omits assembled dimensions, contact-point spacing, materials, and return terms. Renters may also want to avoid wall-mounted designs that require anchors they cannot use.
Skip any listing that promises to eliminate bacteria, fungus, odor, or mold merely through passive storage, or that implies a rack treats a foot or skin problem. Those claims are outside what an ordinary drying rack can establish.
Bottom line
The best passive shoe drying rack is one that fits the loaded shoes and the entryway, keeps pairs separated for ordinary airflow, controls drips, remains stable, and can be cleaned. Measure first, follow the footwear care label, and choose a simple tray-and-shelf setup when it solves the same problem with less clutter.