Work-lunch organization comparison
Lunch-Bag Divider vs Separate Pouches for Workday Packing
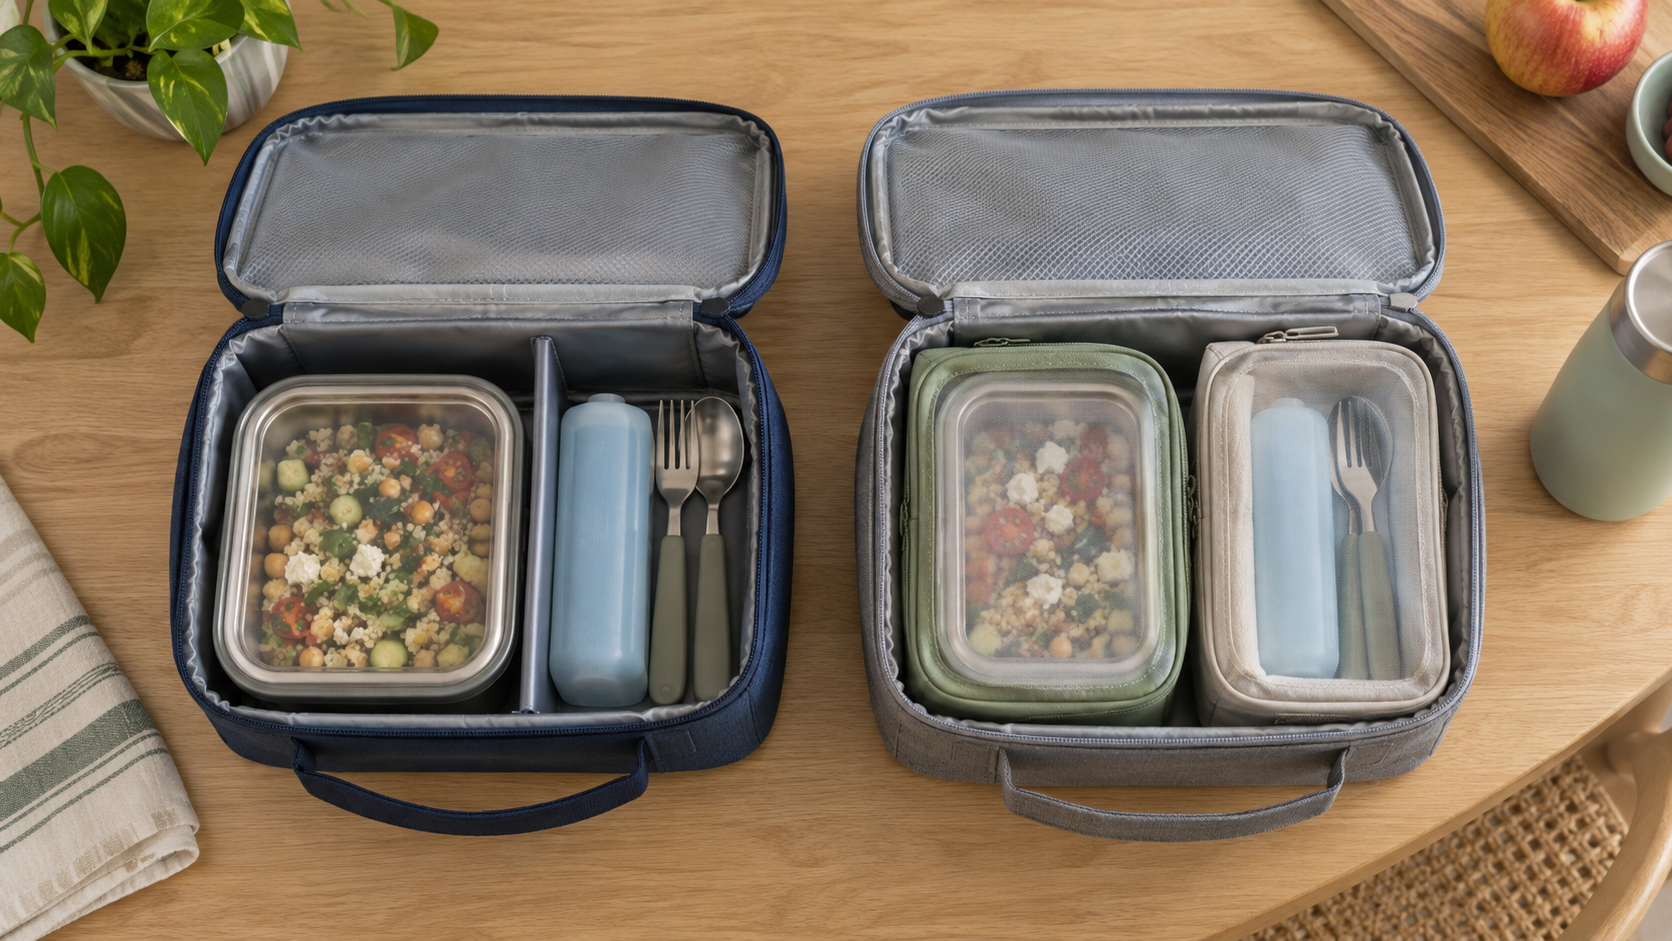
A divider creates stable zones inside one bag; separate pouches let the layout change from day to day. Neither keeps food cold, prevents leaks, or fixes a bag that is the wrong size. Start with the containers and accessories you repeatedly carry, then choose the least fussy way to keep them accessible.
As an Amazon Associate, GoodWeighFinds earns from qualifying purchases.
The quick comparison
| Decision | Internal divider | Separate pouches |
|---|---|---|
| Best fit | A repeat load with containers that need consistent zones | A changing load with utensils, napkins, snacks, or other small items |
| Space pattern | Reserves lanes even when one side is empty | Uses space only where each filled pouch sits |
| Container support | May limit side-to-side movement when correctly fitted | Groups items but does not brace a larger container |
| Access | Main items remain visible when the bag opens | Small items are grouped but may require opening another closure |
| Upkeep | Remove or wipe according to its care label | Empty, wash, and fully dry each pouch as directed |
| Empty storage | May stay in the bag or need a flat storage spot | Soft pouches may nest or fold, depending on construction |
Start with the bag and the actual load
Measure the lunch bag's usable interior width, depth, and height rather than relying on outside dimensions. Note the space taken by seams, lining folds, ice packs, and the lid or zipper as it closes. Then arrange a typical workday load inside the bag and photograph or trace the layout. The useful organizer is the one that solves a repeated problem in that real arrangement.
An organizer cannot add capacity. A divider consumes some internal width, while pouches add layers, seams, and closures around their contents. If the current containers only fit when pressed against the bag walls, either option may make packing worse.
Who an internal divider fits
A removable divider makes sense when the same two or three items travel most days and one needs a defined lane. For example, an upright container might sit beside an ice pack and utensil area. The benefit is a predictable layout, not a promise that the contents will remain upright or leak-free.
- Measure attachment points: hook-and-loop panels, slots, or side pressure must match the bag rather than merely fitting its stated volume.
- Check full height: a short divider may not influence tall items, while a tall one may interfere with the lid or mesh pocket.
- Test removal: it should come out without stressing the lining or trapping crumbs along an inaccessible seam.
- Verify care: do not assume a padded, cardboard-core, or hook-and-loop divider is machine washable.
Who separate pouches fit
Pouches suit a lunch kit that changes: utensils on one day, napkins or condiment containers on another, and no extra group at all on a light-packing day. They can also make a small kit easier to transfer between bags. Choose by the items that must fit inside—not by the pouch's broad “lunch” label.
- Measure the closed pouch: include zipper tabs, seams, and the bulge of the normal contents.
- Count access steps: a pouch keeps small items together but adds a closure to open at lunch and again during cleanup.
- Keep claims narrow: a pouch is not a substitute for a suitable food container, and “water-resistant” does not establish leak containment.
- Plan drying space: gussets, zipper tape, and lining folds may need to be held open after washing.
Setup and maintenance tradeoffs
With a divider, setup is mostly a one-time fit problem followed by small adjustments when the load changes. The tradeoff is that fixed zones can waste space. With pouches, setup repeats whenever items move between groups, but each pouch can leave the bag entirely when it is not useful.
For either format, follow the maker's care directions and clean food spills promptly. Remove all parts before drying so seams and the lunch-bag lining are exposed to air. Neither organizer changes the cold-holding limits of the bag, ice pack, food container, or workplace refrigerator. Follow the directions for those products and normal food-safety guidance separately.
Run a no-buy packing test
Before shopping, make a temporary divider from a clean, rigid container already in the kit; do not use loose paperboard where it can contact spills. On another day, group small non-food-contact items in clean pouches you already own. Pack the same lunch bag, close it completely, carry it through the normal commute, and notice only practical friction: wasted space, buried items, extra opening steps, and cleanup.
If rearranging the containers or using one existing utensil case solves the problem, skip both purchases. If a divider is still the clear fit, first use the narrower guide on whether a lunch-bag divider earns its space.
Skip criteria
- Skip both when the bag is already easy to pack and unpack.
- Skip the divider when loads change often, its attachment is incompatible, or it blocks closure.
- Skip pouches when added seams and closures make small items harder to reach or create unwanted washing.
- Replace or repair the bag instead when its lining, zipper, insulation, or structure is damaged; an organizer does not restore those functions.
- Use suitable closed food containers rather than either organizer when spill containment is the actual problem.
Bottom line
Choose a lunch-bag divider for a stable repeat layout and separate pouches for flexible small-item groups. Measure the loaded interior, count the added care steps, and skip both if containers you already own create a workable layout. For the larger carry decision, use the insulated lunch-bag guide; for broader product-neutral choices, visit the routine-support tools guide.