Transit lunch-backpack buying guide
Best Insulated Lunch Backpacks for Transit Commutes
The best format is the smallest backpack that holds the containers and cold pack you actually carry, stays manageable through the whole route, opens where you need access, and can be cleaned and dried without becoming another weekly chore.
As an Amazon Associate, GoodWeighFinds earns from qualifying purchases.
Start after the buy-or-skip decision
This guide is for commuters who have already decided a dedicated hands-free lunch carrier solves a repeated problem. If that is not settled, use the insulated lunch backpack buy-or-skip guide. If a tote may be easier to handle, compare an insulated tote with a lunch backpack before shopping.
A lunch backpack is routine-support gear, not a weight-loss product. Choose it for carrying and cleanup fit, not for portion, appetite, discipline, or body-result language.
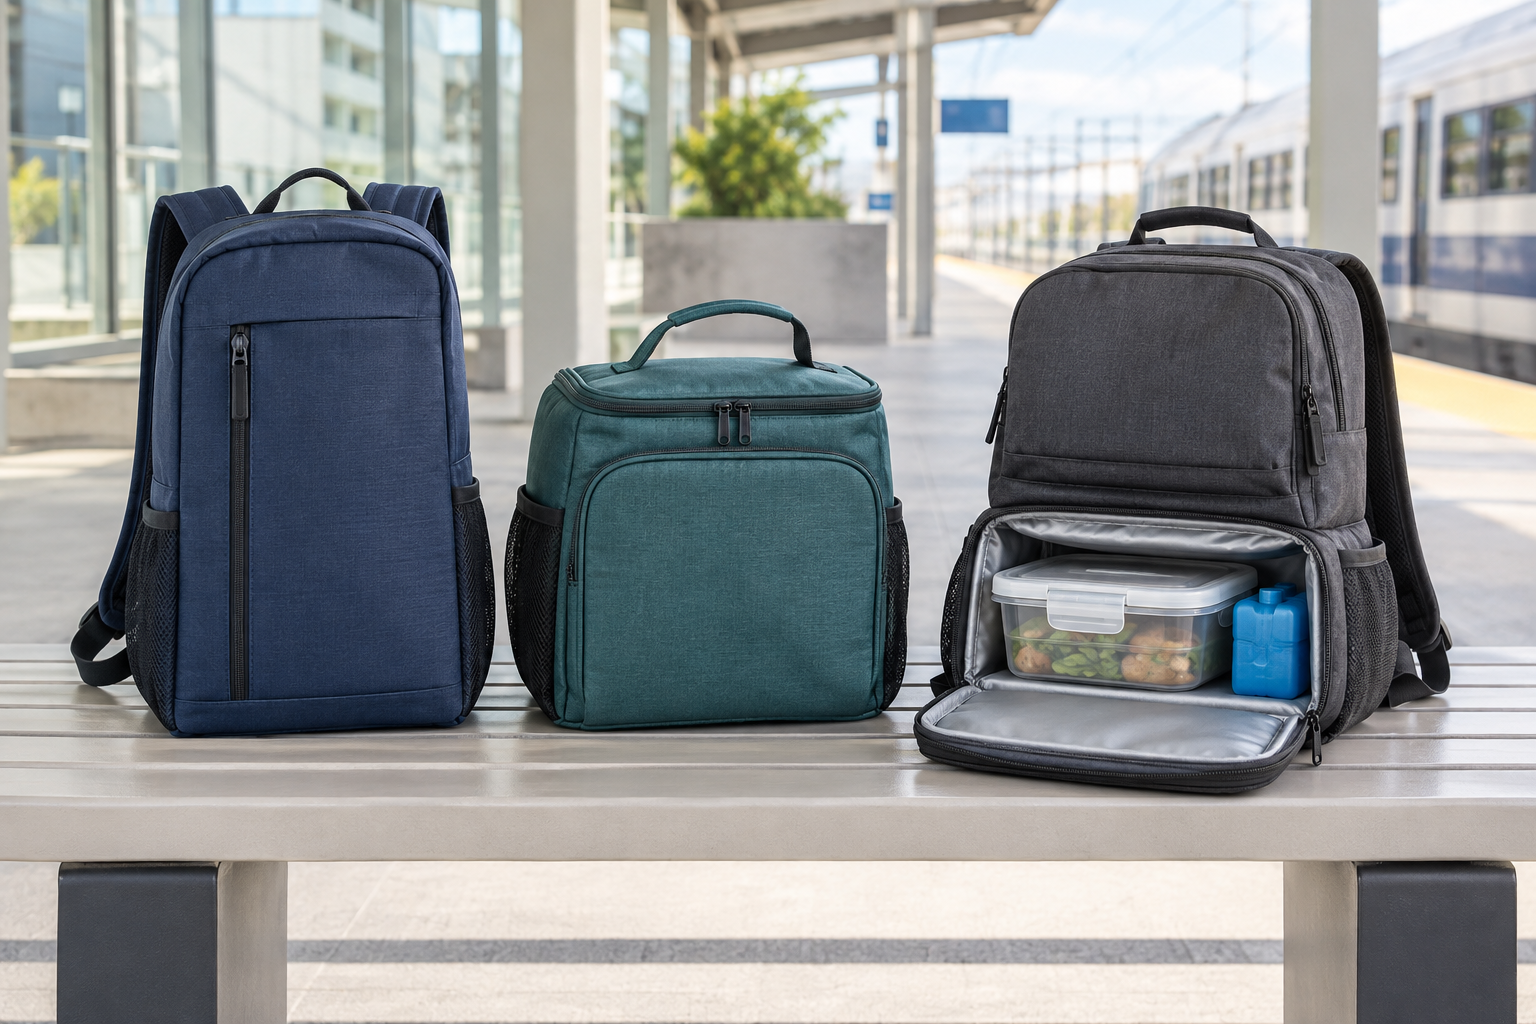
Three formats worth comparing
| Format | Useful when | Measure first | Main tradeoff |
|---|---|---|---|
| Slim vertical pack | Your route is crowded and containers fit upright | Interior width, container orientation, bottle placement, loaded depth | Narrow openings or stacked items can slow access |
| Compact boxy meal pack | You carry one main container and want a short pack | Base, full container footprint, cold-pack space, destination storage | A boxy shape may project farther behind you |
| Divided two-compartment pack | You need separate meal and personal-item zones | Each compartment—not just total exterior volume | Dividers and seams can reduce usable space and complicate cleaning |
Seven checks before choosing a format
- Pack the real load: group the containers, utensils, bottle, cold pack, napkin, and any personal items you expect to carry. Do not substitute a seller's meal-count claim for measured fit.
- Compare usable dimensions: interior corners, lining thickness, dividers, zipper curves, and seams can reduce space. Exterior measurements do not prove that a container will sit flat.
- Check empty and loaded weight: add the bag's stated empty weight to the items you grouped. Product photography cannot establish whether the result will suit your route.
- Trace the crowded-vehicle profile: measure the loaded depth and note when the pack must come off for a seat, turnstile, aisle, or packed bus or train.
- Inspect access: decide whether lunch must be reached while standing, at a station, or only after arrival. Look for openings that expose the intended compartment without unpacking everything.
- Verify straps and handles: use the stated adjustment range and construction details. Words such as “ergonomic” or “comfortable” are not fit evidence.
- Read the complete care path: check whether the lining can be reached, wiped, and dried; whether removable parts have separate instructions; and where the open bag will air-dry.
Run a no-buy route test
Put the normal lunch load in a backpack you already own, using a separate washable container or pouch if needed. Carry it through five ordinary commutes. Record the loaded dimensions, where access became awkward, whether containers remained in their intended orientation, where the bag was stored, and how much time unpacking and cleanup took.
This test does not reproduce insulation or spill behavior. It does reveal whether hands-free carry, loaded depth, access, and destination storage justify a dedicated format. If the existing setup works, the best choice may be no new backpack.
Claims that need better evidence
- “Keeps food cold all day”: insulation wording does not establish a safe duration. Starting temperature, cold packs, ambient conditions, time, opening, and storage all matter.
- “Leakproof”: find the exact component and test conditions covered. A lining claim does not guarantee that a container, zipper, seam, or whole bag will contain every spill.
- “Large capacity”: use usable dimensions and your actual load. Liters and meal counts do not show container orientation or divided-space loss.
- “Waterproof” or “weatherproof”: identify whether the claim covers fabric, seams, zippers, or the assembled bag and follow the maker's stated limits.
- “Comfortable”: fit depends on the wearer, strap range, load, clothing, and route. Photos and padded-strap language are not a guarantee.
- “Built to last”: construction photos and warranty terms can inform a comparison, but broad durability language is not proof of lifespan.
Cleaning, storage, and seller checks
Before ordering, inspect the current listing for lining material, seams, removable inserts, wash restrictions, drying instructions, and whether every food- or condensation-prone area is reachable. Confirm where the open bag will dry and where the empty bag will live between commutes.
Record the seller, included parts, return window, return condition, and any return-shipping terms before purchase. Check the listing again at checkout because these details can change. Avoid assuming that replacement liners, straps, zipper parts, or compartment inserts will remain available.
Who should skip these backpacks
Skip a dedicated lunch backpack when an existing carrier passes the route test, the commute is occasional, workplace storage is too small, a tote provides easier access, or the cleaning and drying path is unrealistic. Skip any listing that withholds dimensions needed to check your containers or relies mainly on meal-count, comfort, leakproof, cooling-duration, or weight-loss promises.
If carrying an ordinary packed load causes pain, numbness, instability, or another physical difficulty, marketing about padding or ergonomic design is not a substitute for individualized guidance.
Bottom line
For crowded transit, start with the smallest measured profile that fits the real load. Choose a slim vertical pack when depth and hands-free movement matter, a compact boxy pack when one main container drives the decision, or a divided pack only when separate zones earn the lost space and extra cleaning. Use the broader insulated lunch bag guide for temperature-claim, container-fit, and routine context.