X vs Y comparison
Bottle Drying Rack vs Dish Rack for Reusable Bottles
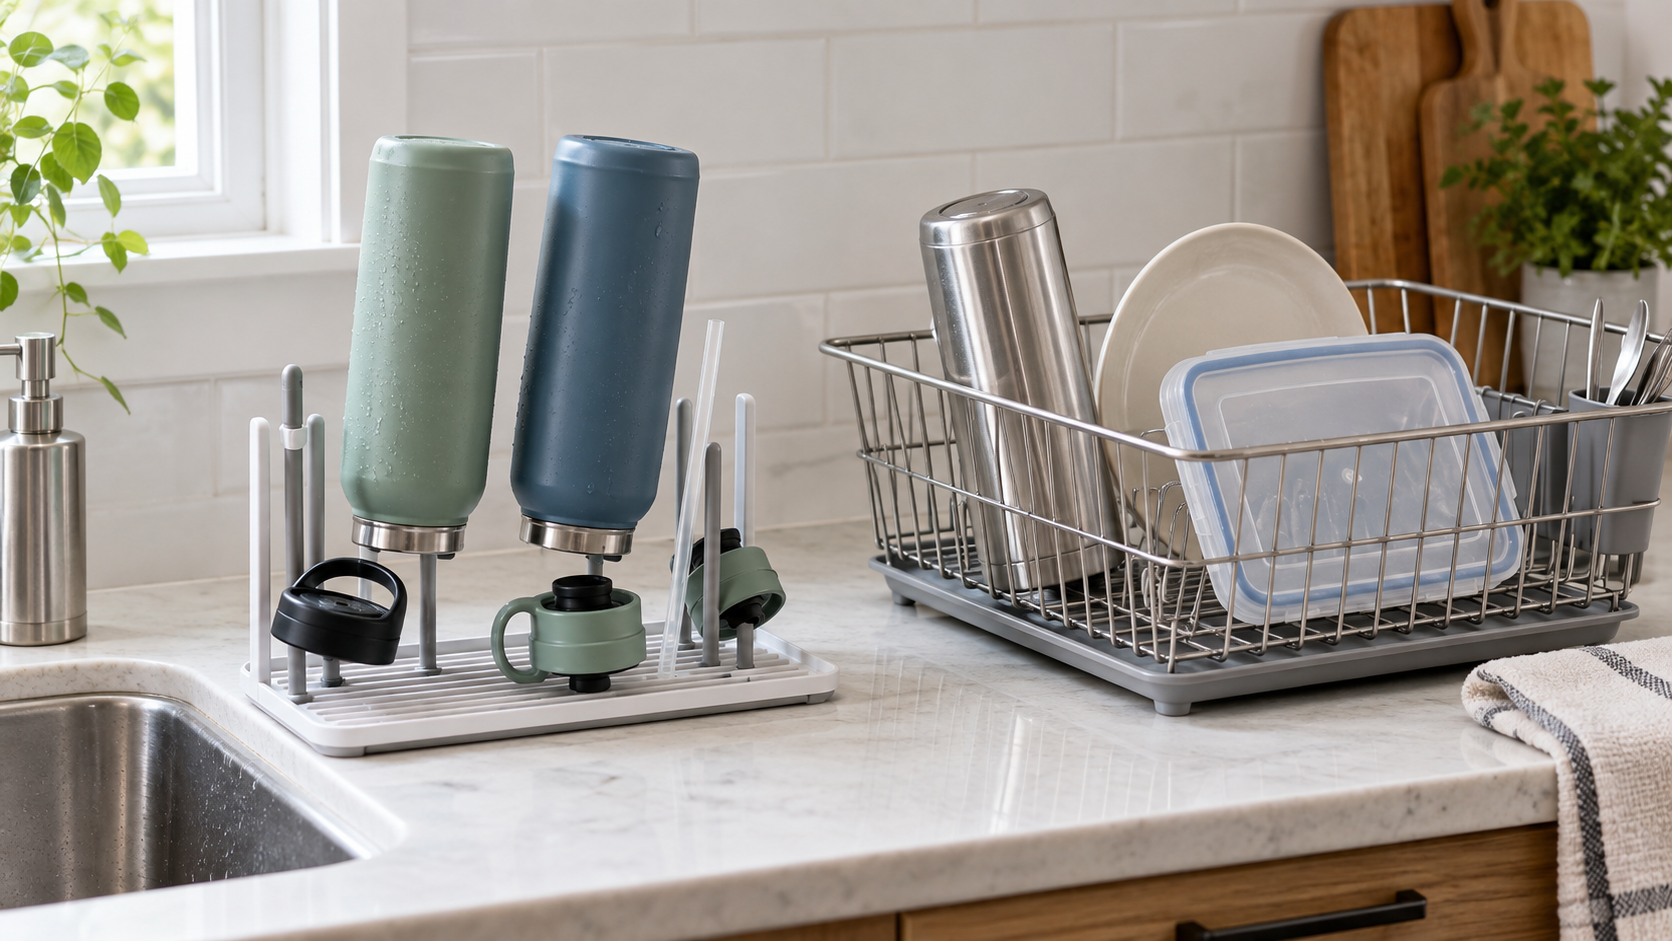
A dedicated bottle rack separates tall bottles, lids, straws, and small seals. A general dish rack shares its space with plates, containers, and everyday dishes. The better format is the one that fits the parts you repeatedly wash without creating a second cleanup or storage problem.
As an Amazon Associate, GoodWeighFinds earns from qualifying purchases.
The quick decision
- Choose a dedicated bottle rack when bottles and loose lid parts make up most of the drying load, tall items need individual support, and a measured spot can remain available for the rack.
- Choose a general dish rack when bottles are only part of a mixed load and one rack can support them without crowding, tipping, or trapping small parts.
- Use both only for a real capacity gap when bottle parts routinely displace dishes and the second rack has a defined counter and storage location.
- Buy neither when an existing rack, clean towel, or other maker-approved drying setup already holds each part securely with space for air to circulate.
What is actually different?
A bottle rack is built around narrow vertical supports and small-part stations. That layout can keep bottle mouths, straws, lids, valves, and seals separated, but it may have little useful space for plates or cookware. A dish rack is built around mixed loads. Its slots, basket, and utensil cup may handle everyday dishes efficiently while giving tall bottles or tiny lid pieces less deliberate support.
Neither label establishes hygiene, sanitation, mold prevention, or faster drying. A rack only supports a drying workflow. Results depend on how the parts fit, whether water can drain, whether air reaches surfaces, and whether the rack itself is cleaned according to its directions.
Audit one week of washed parts
Before shopping, note every bottle, cup, lid, straw, gasket, plate, food container, and utensil that reaches the rack during a normal week. Record the busiest single load rather than adding the entire week together. This shows whether the problem is bottle specialization, total capacity, or simply poor arrangement.
Measure the tallest bottle, widest bottle opening, longest straw, largest lid, and smallest loose seal. Then measure the usable counter area under any cabinet, including room to remove a drip tray. Product footprint alone is incomplete: bottles and accessories can extend above and beyond the base.
Compare the practical tradeoffs
- Bottle support: Check whether the intended peg or rack section supports the bottle without stressing a mouthpiece, touching an interior surface unnecessarily, or making the loaded rack unstable.
- Loose-part control: Count actual lid pieces, straws, valves, and seals. A general utensil cup can swallow small pieces; a bottle rack can still lack enough useful posts.
- Drainage: Trace where water leaves every support, groove, basket, and tray. “Removable tray” does not show that it is easy to remove when the rack is loaded.
- Mixed-load capacity: A dish rack may avoid a second product when bottles share space successfully. A bottle rack may preserve the main rack for dishes when multi-part bottles dominate it.
- Loaded footprint: Include leaning bottles, open drain spouts, utensil cups, tray handles, and clearance needed to unload each item.
- Cleaning: Look for removable supports, reachable corners, open channels, and maker instructions for the rack and tray. More pegs and sockets also mean more surfaces to clean.
- Storage: A rack that folds or disassembles only saves space if the process is simple enough to use and all parts can be stored dry.
Run a no-buy layout test
Use painter's tape or paper to mark the listed footprint on the counter. Place your clean bottle parts within that boundary on a towel, grouping them as the proposed rack would. Add the dishes normally washed at the same time. Check overhead clearance, sink access, water flow toward the drainboard, and whether each piece can be removed without knocking another over.
If the bottle pieces fit comfortably within the current dish-rack routine, specialization may add clutter rather than capacity. If they repeatedly occupy the entire rack or fall through its openings, a measured bottle rack may solve a specific problem.
Claims to treat cautiously
Do not treat “hygienic,” “mold-free,” “sanitary,” “universal,” “non-slip,” or “fast drying” as established outcomes without relevant, current support for the exact product and use. Photos may omit oversized bottles, full dish loads, narrow cabinet clearance, water pooling, or the space needed to handle the drip tray.
Material names also do not prove durability or care compatibility. Verify each maker's material description, heat and dishwasher directions, assembly steps, and replacement-part information instead of generalizing across plastic, silicone, coated metal, or stainless-steel racks.
Setup, upkeep, and skip signs
On arrival, compare the rack and included parts with the listing before use. Assemble it only as directed, place it on a stable surface, and test the empty layout before adding one bottle at a time. Keep the load within stated limits and avoid positions that put a top-heavy bottle near the counter edge.
Clean the rack, tray, sockets, joints, and small-part holders on the maker's schedule and let them dry before closed storage. Stop using the rack if pegs loosen, coatings chip, supports deform, a tray no longer sits securely, or damage creates areas that cannot be cleaned as directed.
Skip a dedicated rack when bottle use is occasional, the current dish rack already works, the counter cannot hold the loaded footprint, or the proposed rack has no place to dry and store. Skip a larger dish rack when bottle parts are the only capacity problem and expanding the full dish setup would consume more room than a compact specialist rack.
Related decisions
If specialization looks useful, compare bottle drying rack formats by exact peg spacing, drainage, loose-part storage, and footprint. If you are still deciding whether any specialist rack earns its space, use the bottle-rack worth-it test. For mixed loads, the dish-rack guide focuses on containers, lids, drainboards, and overall capacity.
If reaching the parts is the real bottleneck, compare bottle cleaning brushes instead of adding drying capacity. This page supports the routine-support tools pillar: solve the repeat task without turning an ordinary kitchen tool into a health or body-result promise.
Bottom line
Choose a bottle drying rack for a bottle-heavy, multi-part load that a measured specialist layout handles better. Choose a dish rack when one shared setup supports bottles and everyday dishes without crowding or instability. Audit the real load first; the best outcome may be rearranging the rack you already own.