Simple drinking path or straw assembly
Wide-Mouth Bottle Lid vs Straw Lid for Easier Cleaning
Choose a simple open-spout lid when fewer documented pieces and a direct cleaning path matter most. Choose a straw lid when its drinking position is genuinely more useful and you are willing to remove, clean, dry, inspect, and correctly reassemble every part. The exact lid diagram and care instructions—not the product name—decide how much work either format creates.
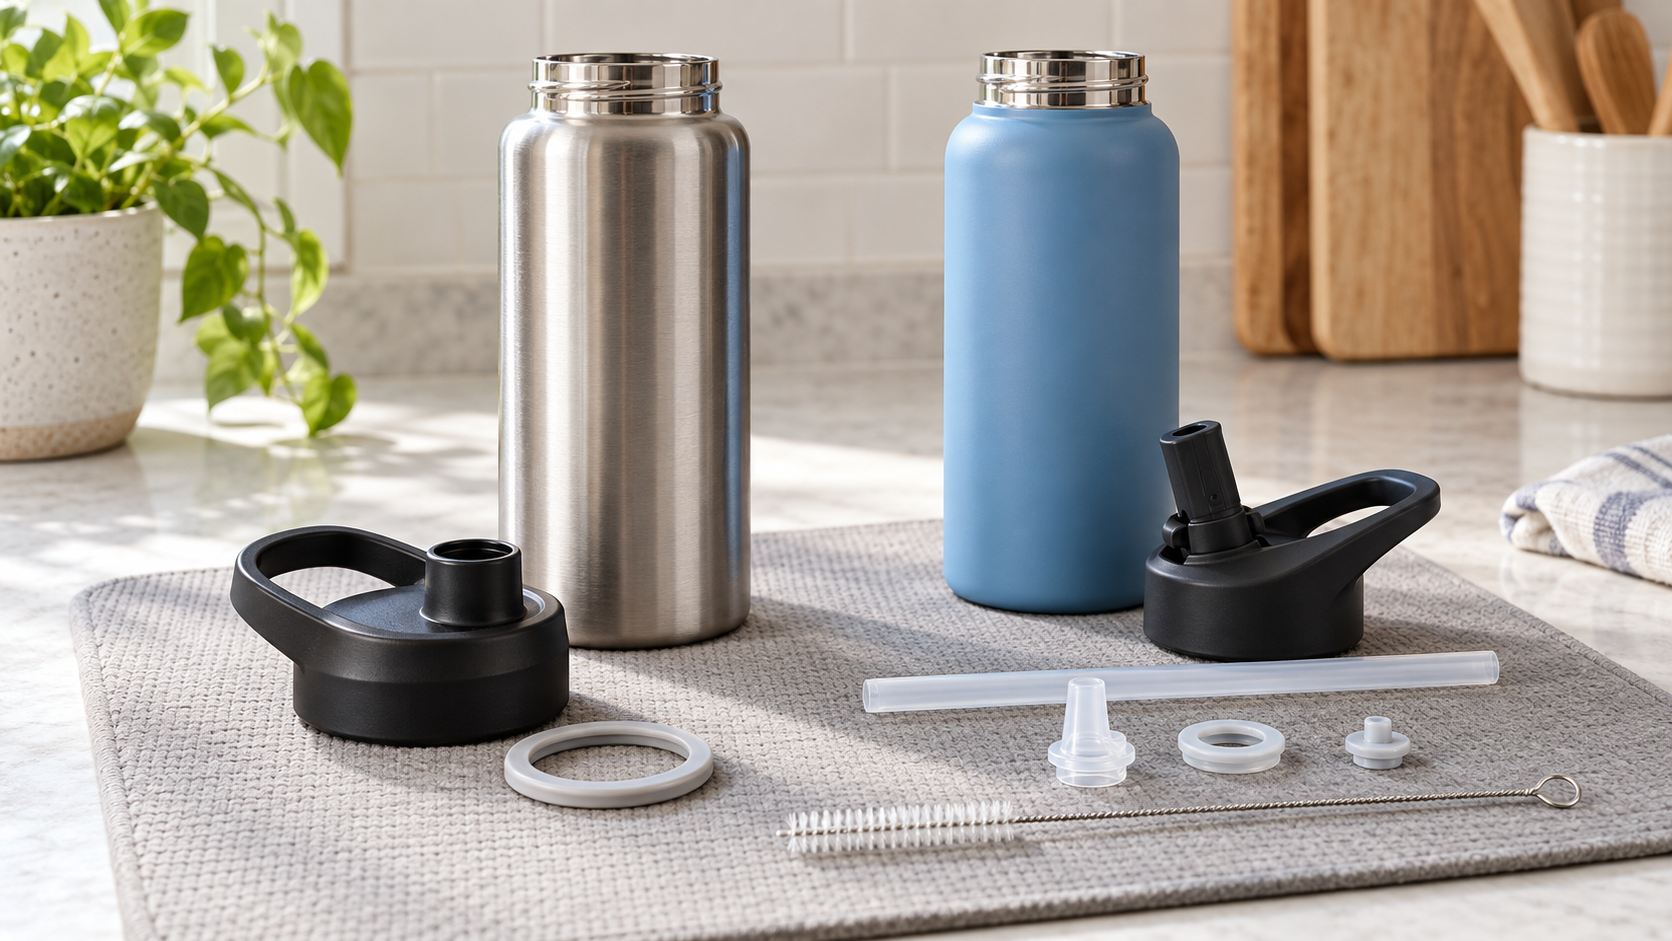
Quick decision: compare the real parts
| Decision | Simple wide-mouth or open-spout lid | Straw lid |
|---|---|---|
| Drinking path | Direct opening or spout | Mouthpiece, internal channel, and straw |
| Cleaning check | Inspect opening, underside, gasket, threads, and any closure | Inspect mouthpiece, channel, valve or seal, straw, gasket, and hinge if present |
| Drying | Needs space for each removed piece | Usually needs more separated positions and attention to narrow channels |
| Compatibility | Match thread, diameter, seal, and bottle series | Match all lid dimensions plus straw length and connection |
| Best no-buy test | Count and clean the current lid's parts | Simulate the extra straw-cleaning and drying step for one week |
Who the simpler lid fits
A simple lid fits a reader who wants to see the drinking path, reach the surfaces with ordinary washing tools, and manage fewer loose pieces. “Wide-mouth” describes the bottle opening, not necessarily the lid architecture: some wide-mouth bottles ship with complex caps, valves, or straw assemblies. Review the exact maker diagram and current care instructions rather than assuming the label guarantees simplicity.
Check the opening size, underside geometry, gasket access, thread match, closure parts, complete exterior height, carry fit, and documented washing method. A low part count is useful only if every surface can be accessed and each removed piece has a reliable drying place.
Who the straw lid fits
A straw lid fits when sipping without tipping the bottle is important enough to justify its assembly. Before buying, identify every removable component in the maker diagram: straw sections, mouthpiece, valve, seals, gasket, hinge, and any vent. Confirm whether the maker expects pieces to be removed for washing and whether replacements are sold for the exact bottle series.
Measure the required straw length and check how it attaches. A listing that merely says “compatible” is not enough when thread pitch, lid diameter, bottle generation, straw connector, or cut length is unclear. Do not infer leak resistance, sanitation, durability, or easier drinking from the format alone.
Tradeoffs that matter
- Access: a visible opening is easier to assess than a hidden channel, but either format may contain a removable seal or closure.
- Part count: count only pieces shown in current documentation. More pieces create more places to wash, dry, store, and reassemble.
- Drinking motion: an open spout commonly requires tipping; a straw commonly supports upright sipping. Test whether that difference matters at a desk, on a walk, or in transit.
- Carry: handles, flip tops, and projecting mouthpieces change bag and cup-holder clearance. Format does not prove leak performance.
- Replacement path: verify exact-model gaskets, straws, mouthpieces, and lids before treating the bottle as repairable.
- Storage: small wet parts need a stable drying position and a place where they will not be lost.
Setup and maintenance
Start with the maker's current parts diagram and washing directions. Photograph or sketch the assembly before the first disassembly. Wash only as directed, keep small seals visible, dry every piece separately, then reassemble in the documented order. Replace a component only with a confirmed model match.
For a straw lid, also record which brush reaches the full straw and mouthpiece channel without forcing it. For a simpler lid, confirm that the gasket and closure remain accessible rather than treating “fewer parts” as “no maintenance.” If instructions are missing or conflict across the listing and maker site, pause instead of improvising.
A seven-day part-count worksheet
| Record | Why it changes the choice |
|---|---|
| Documented removable pieces | Sets the real wash, dry, and reassembly workload |
| Narrow channels and matching tools | Shows whether existing brushes reach every directed surface |
| Minutes of hands-on care | Reveals whether the routine is sustainable without claiming one format is universally faster |
| Drying positions used | Tests available rack or counter space |
| Times upright sipping mattered | Shows whether the straw's added function solves a repeated need |
| Lost or awkward pieces | Identifies maintenance friction before a replacement purchase |
This is a hypothetical household decision worksheet, not a hygiene test or evidence that either lid is easier to clean. Follow the exact maker's cleaning and replacement instructions.
Skip criteria
- Skip a new lid if the current one is intact, compatible, fully accessible under its care instructions, and manageable to clean and dry.
- Skip the straw lid if upright sipping rarely matters or the extra parts repeatedly remain unwashed, wet, or misplaced.
- Skip the simpler lid if tipping the bottle conflicts with the actual setting or access need.
- Skip either listing when the exact bottle series, thread or diameter fit, included pieces, straw length, care method, seller, or return terms are unclear.
- Skip “universal,” “leakproof,” “hygienic,” “easy-clean,” or durability claims that lack exact, current model support.
- Skip weight-loss, detox, appetite-control, or prescribed-hydration claims; a lid format is a routine tool, not a body-result product.
Primary-source examples: what the makers actually document
- Nalgene Wide Mouth Cap: Nalgene’s current Wide Mouth Cap product page identifies this exact accessory as a replacement closure for its wide-mouth bottles and labels it dishwasher safe. That supports only the documented closure type, fit family, and care label for this model. The page does not provide a disassembly diagram or a complete removable-part count, so it cannot establish that every wide-mouth cap has fewer pieces or is easier to clean.
- Owala Kids’ FreeSip bottle: Owala’s care instructions for the Kids’ FreeSip Water Bottle tell the owner to unscrew the lid, pull out the straw, and remove the rubber gasket under the lid for cleaning. This is direct evidence that this exact straw-lid model has separately handled straw and gasket components; it does not describe every FreeSip size or prove that all straw lids use the same assembly.
GoodWeighFinds checked both maker URLs successfully on October 29, 2026. These examples show why the model’s own parts and care documentation matter; they are not rankings, hands-on cleaning tests, timing evidence, or proof of hygiene, durability, leak resistance, or universal ease of cleaning.
Next steps after choosing the format
If the bottle itself is unresolved, compare wide-mouth bottles by opening, lid parts, gasket access, and maker care labels. If an existing bottle needs repair, use the replacement straw and lid guide to confirm exact compatibility. For narrow channels and seals, compare bottle-cleaning brushes by measured reach and head size. The routine-support tools guide keeps the larger decision focused on practical friction rather than weight-loss promises.
As an Amazon Associate, GoodWeighFinds earns from qualifying purchases.
Bottom line
A simple lid is the stronger default when direct access and fewer documented parts reduce friction. A straw lid earns the extra care only when upright sipping solves a repeated problem and its full assembly can be cleaned, dried, inspected, and replaced as directed. Count the actual pieces and test the maintenance routine before buying either format.